- 프리즈마는 대중적인 타입스크립트 지원 ORM 중 하나입니다. 프리즈마 설치 전에 기본적인 DB 개발 환경은 갖춰두어야 합니다. 설치 명령은 아래와 같습니다.
npm i prisma
- 사용법
설치 후 프로젝트에 프리즈마 적용을 위해 아래 명령을 실행합니다. 그러면, 루트에 prisma 폴더와 함께 그 아래 schema.prisma 파일이 새로 생성됩니다. 덤으로 데이터베이스 스키마 정보 연동을 위한 환경변수 설정에 필요한 .env 파일도 알아서 생성해줍니다.
npx prisma init✔ Your Prisma schema was created at prisma/schema.prisma
You can now open it in your favorite editor.
warn You already have a .gitignore file. Don't forget to add `.env` in it to not commit any private information.
Next steps:
1. Set the DATABASE_URL in the .env file to point to your existing database. If your database has no tables yet, read https://pris.ly/d/getting-started
2. Set the provider of the datasource block in schema.prisma to match your database: postgresql, mysql, sqlite, sqlserver, mongodb or cockroachdb.
3. Run prisma db pull to turn your database schema into a Prisma schema.
4. Run prisma generate to generate the Prisma Client. You can then start querying your database.
More information in our documentation:
https://pris.ly/d/getting-started
순서대로 하려면 먼저 .env 파일을 확인하고 데이터베이스 정보를 입력해줍니다. 데이터베이스 정보(DATABASE_URL)는 개발자가 선택한 데이터베이스 유형마다 다른 패턴을 가지므로 프리즈마 공식 사이트에서 정확히 확인하고 기재해야 합니다.
- 초기 .env 파일을 보면, 데이터베이스별 프리즈마 연동법을 설명한 상세 페이지가 기재돼 있으니 확인
- 데이터베이스 정보는 노출해서는 안 되는 개인정보이므로, .gitignore 파일에 .env 추가 필수
# Environment variables declared in this file are automatically made available to Prisma.
# See the documentation for more detail: https://pris.ly/d/prisma-schema#accessing-environment-variables-from-the-schema

# Prisma supports the native connection string format for PostgreSQL, MySQL, SQLite, SQL Server, MongoDB and CockroachDB.
# See the documentation for all the connection string options: https://pris.ly/d/connection-strings

DATABASE_URL="postgresql://johndoe:randompassword@localhost:5432/mydb?schema=public" // 여기 부분 변경
schema.prisma 파일에서 선택한 데이터베이스를 제공자(provider)로 변경합니다.
//schema.prisma

generator client {
    provider = "prisma-client-js"
}

datasource db {
    provider = "postgresql" // 변경
    url      = env("DATABASE_URL")
}
(로컬 db라면 sqlite를 입력)
그후 모델을 만들어줍니다.
ex)

model User {
            id         Int      @id @default(autoincrement()) //첫번째 사용자는 자동으로 1부터 시작
            username   String   @unique
            phone      String?  @unique
            email      String?  @unique
            password   String?
            kakao_id   String?  @unique
            avatar     String?
            created_at DateTime @default(now())             //새유저가 만들어질때 그 시점의 날짜
            updated_at DateTime @updatedAt               //수정될 때 마다 수정된 시간을 넣음
      }
데이터베이스가 연결이 돼 있는 상태라면 터미널에서 아래 명령을 입력합니다.
.env 파일에 환경변수로 입력된 DATABASE_URL과 schema.prisma 파일에 입력된 스키마 모델을 토대로 새로운 데이터베이스를 만들어주는 명령입니다.
이 명령은 스키마를 변경했을 때마다 재실행해줘야 합니다.
npx prisma migrate dev
(마이그래이션 설치 이유 db에서 만든 변경사항을 계속해서 추적해야 되기 때문입니다.)
그러면 아래와 같은 질문이 뜨는데, 깃 커밋 메시지와 같은 개념입니다. 아래와 같이 모델과 관련성 있는 이름을 짓고 엔터를 누릅니다. 띄어쓰기가 허용되지 않으므로, 필요한 경우 '_'를 넣어 작성합니다.
? Enter a name for the new migration: add_user위 일련의 행위는 아래 명령으로 한 번에 처리할 수도 있습니다.
npx prisma migrate dev --name ["모델 변경 설명(제목)"]
이후 prisma 폴더 아래 migrations 폴더가 새로 생성되고 그 하위에 날짜_모델변경설명(제목)형식의 폴더와 CREATE 문이 입력된 migration.sql 파일이 추가된 걸 확인할 수 있습니다.
이 시점에서 데이터베이스가 새로 생성된 것도 확인 가능한데, 약간의 시간차가 발생할 수 있으니, 새로고침을 계속 눌러줍니다.
또, 이때 프리즈마에서 아래 위치에 방금 만든 스키마를 위한 JS 파일과 타입까지 새로 생성했다는 사실도 확인할 수 있습니다.
마이그래이션 설치가 완료되면 db가 만들어집니다. 이것도 .gitignore에 추가합니다 => *.db, *.db-journal
-node_modules/prisma/client,
-node_modules/@prisma/@client
이 코드들 또한 개발에 활용 가능하므로 다음과 같이 import 해서 쓰면 됩니다.
- Prisma Client 설정방법
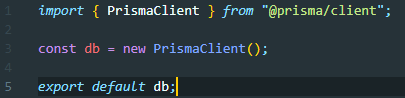
util 폴더에 db.ts를 만들어 줍니다.

import { PrismaClient } from "@prisma/client";를 임폴트 해준 뒤
new PrismaClient();로 초기화 해줍니다.
이제 프리즈마를 사용하여 db를 불러올때에는
이런식으로 간편하게 불러올 수 있습니다.
프리즈마에서 제공하는 무료 DB프로그램은 아래의 명령어로 실행 가능합니다.
스키마를 변경한 경우, 실행중인 프리즈마 스튜디오 종료 후 재실행을 하여야 새로운 스키마가 반영된 DB를 볼 수 있습니다.
npx prisma studio
prisma 사용 방법 예시)
- 등록
|
1
2
3
4
5
6
7
8
9
10
11
12
13
14
|
import db from "@/app/_libs/_server/db";
const message = await db.message.create({
data: {
payload,
chatRoomId,
userId: session.id!,
},
select: { id: true },
});
revalidateTag("get-messages");
return message;
}
|
cs |
- 조회 (JOIN)
|
1
2
3
4
5
6
7
8
9
10
11
12
13
14
15
16
17
18
19
20
21
22
23
24
25
26
27
28
29
|
import db from "@/app/_libs/_server/db";
import getSession from "@/app/_libs/_server/session"; //session은 쿠키 세션을 lib으로 만든것
async function getRoom(id: string) {
const room = await db.chatRoom.findUnique({
where: {
id,
},
include: {
users: {
select: {
id: true,
},
},
},
});
if (room) {
const session = await getSession();
const canSee = Boolean(room.users.find((user) => user.id === session.id!));
if (!canSee) {
return null;
}
}
//room에 있는 user.id와 session.id가 같을 경우에만 채팅방을 볼 수 있도록 함
//다른 사용자가 url을 알아내서 강제로 보는것을 막기 위함
return room;
}
//채팅방을 찾는 함수
|
cs |
- 조회 - 페이지네이션: skip, take 키 사용
|
1
2
3
4
5
6
7
8
9
10
11
12
13
14
15
16
17
18
19
20
21
22
23
24
25
26
27
28
29
30
31
32
33
34
35
|
"use server";
import db from "@/app/_libs/_server/db";
export async function getMoreItems(page: number) {
const items = await db.item.findMany({
select: {
title: true,
price: true,
created_at: true,
photo: true,
id: true,
userId: true,
_count: {
select: {
hearts: true,
},
},
hearts: {
select: {
userId: true,
},
},
},
skip: page * 8,
take: 8,
orderBy: {
created_at: "desc",
},
//아이템 정렬
});
return items;
}
|
cs |
- 삭제
|
1
2
3
4
5
6
7
8
|
import client from "@/app/_libs/_server/client";
const deleted = await client.post.delete({
where: {
id: postId,
userId,
},
});
|
cs |
- 로그 보기
|
1
2
3
4
5
6
7
8
9
10
11
12
13
14
15
16
17
18
19
20
21
22
23
24
|
import { PrismaClient } from '@prisma/client';
const db = new PrismaClient({
log: [
{
emit: 'event',
level: 'query',
},
{
emit: 'stdout',
level: 'error',
},
{
emit: 'stdout',
level: 'info',
},
{
emit: 'stdout',
level: 'warn',
},
],
});
export default db;
|
cs |
로그 형식을 지정하는 함수는 종단에서 실행될 수 없으므로, libs/hooks.ts 유틸로 분리
|
1
2
3
4
5
6
7
8
9
10
11
12
13
14
15
16
17
18
19
20
21
22
23
24
25
|
export const setQueryLog = (roll: string, caller: string, result?: object | null) => {
db.$on('query', (e) => {
// SQL 키워드 자동 개행 및 색상 부여
const query = e.query
.toString()
.replace(
/(SELECT|UPDATE|DELETE|FROM|JOIN ON|WHERE|GROUP BY|HAVING|ORDER BY|LIMIT|OFFSET)\b/g,
'\n\x1b[35m$1\x1b[0m',
)
.replace(/(DESC|ASC)\b/g, '\x1b[35m$1\x1b[0m')
.replace(/,/g, '\n')
.replaceAll('`', '');
console.log(chalk.black(chalk.bgCyan(` ❖ caller: ${caller} `)));
console.log(chalk.black(chalk.bgCyan(` ❖ roll: ${roll} `)));
console.log(`${chalk.cyan('Query: ')}${query}`);
console.log(`${chalk.blue('Params: ')}${e.params}`);
console.log(
`${chalk.yellow('Duration: ')}${e.duration}ms ${e.duration >= 2 ? chalk.red('Too Lazy') : chalk.green('Good')}`,
);
result && console.log(`${chalk.cyan('Result:')}`);
result && console.log(result);
console.log(chalk.black(chalk.bgCyan(` ❖ DONE! ❖ `)));
});
};
|
cs |
서버 콘솔 - 예시(상품목록 더 보기)
getPosts
목록 조회

 Query:
 SELECT carrot_market_reloaded.User.id
  carrot_market_reloaded.User.username
  carrot_market_reloaded.User.email
  carrot_market_reloaded.User.password
  carrot_market_reloaded.User.phone
  carrot_market_reloaded.User.github_id
  carrot_market_reloaded.User.avatar
  carrot_market_reloaded.User.created_at
  carrot_market_reloaded.User.updated_at
 FROM carrot_market_reloaded.User
 WHERE (carrot_market_reloaded.User.id = ? AND 1=1)
 LIMIT ?
 OFFSET ?
 Params: [5,1,0]
 Duration: 0ms Good
 Result:
 [
   {
     id: 1,
     title: '잠만보 팔아요',
     description: '잠만보 팔아요 연락주세요!',
     views: 0,
     created_at: 2024-05-02T06:33:43.594Z,
     _count: { comments: 0, likes: 2 }
   }
 ]
++
vercel 배포후에는 npx prisma migrate dev를 하면 바로 적용되버리니
npx prisma migrate dev --create-only 를 사용하여 개발자모드로 확인 후에
npx prisma migrate deploy로 배포하면 됩니다.
'코딩이야기 > Next.js 공부' 카테고리의 다른 글
| [React] useFormStatus를 사용한 pending 상태 추적 (0) | 2024.09.09 |
|---|---|
| [Next.js] AWS S3 업로드 이미지 최적화를 해보자! (feat. sharp) (4) | 2024.09.05 |

